
How to take sharper pictures


If I had a nickel for every time someone with a new camera blamed the camera itself as the reason why their pictures aren’t coming out as crisp as those seen in photo books, magazines, or even this website, I’d be able to pay someone to write this guide for me. Unfortunately, I don’t. So here I am.
Here are some easy, but essential tips on achieving the best (and by best, I mean the sharpest) results from your digital camera.
Is it the Camera or the Photographer?
If you are new to photography I would suspect your technique first. If not, the camera or its settings may be at fault.
If you did your research and paid good money for your camera (and lenses) and still aren’t getting good results, you have to wonder, is it really your camera? Without insult, do you really know what you are doing? Do you have training in photography? Do you understand optics? If not…don’t worry. You’re not required to be a pro in order to have fun taking pictures. Just don’t expect to point-and-shoot and come away with prints that look like the pros. After all, there’s a reason why great photographers are getting paid to take pictures. Certainly don’t let that stop you from improving your skills and catching up to the pros… and the best way to do that is to learn how to maximize the sharpness of your photos. This guide will tell you how.
The Camera
There could be several reasons why a camera may not be shooting sharp. In order to ensure you are getting the best image quality from your camera, you need to know what the camera settings mean and how to set them up properly.
Know your camera
Before you set off to photograph anything, you should get to know your camera. Read the instruction manual, learn all the functions of your camera and find out when and how those functions should be used. Learn all the ‘beeps’ and ‘bops’ that your camera uses to tell you when and when not to take a photo.
Set the picture quality and compression
Memory cards are cheap. This means there is little reason to set your camera up to conserve the space it uses for images. Make sure your camera is set to take photos at the highest quality (Super Fine, Best, TIFF or RAW) and also the largest size. That is a good practice because you never know when you’ll take the photo of a lifetime and need to blow it up big for the tabloids.
Keep your lens clean
Fingerprints and smudges will blur portions of your images and interfere with the focusing system. Use a lens cleaning kit when necessary. Remove any extra filters, since the more glass you add to the lens, the less light makes it through.
Focusing
Cameras today offer a wide range of focus options. Manual, semi-manual and an array of automatic methods. Although it is nice to have variety, more complicated options often confuse new photographers, who expect the camera to always know where and how to focus. Luckily, with digital cameras, you can immediately see if your shot came out well. The problem is that with small preview screens, it is often difficult to tell if something is slightly off-focus. The best strategy is to make sure you understand how focusing works and how to optimize it. Simply put: don’t rely solely on the camera to focus.
Unfortunately cameras either have to start reading your mind or develop better intelligence to determine what you want to have in focus. In fact, most recent digital camera models can recognize human faces and set the auto focus to their eyes (which is where you want it to be when shooting portraits).

Distance
The range in which a camera or lens can focus can be limiting. Some cameras cannot lock on an object that is within a foot or less of the lens. Check the minimum focus distance of your camera model or lens to see if you are within that limitation. If you are taking vast landscapes with a large field of view, typically these types of photos give the illusion of less sharpness because they have so much information. In some cases you just may be focusing on something in the foreground when you need it to focus in the background, or vice-versa. Always check your first shot in a new environment with a new shooting distance to make sure your getting the proper focus before shooting on.
Give it time
All digital cameras nowadays have a 2-stage shutter button. By pressing the shutter half-way, the camera engages the auto focus and will often beep when it has a lock on something. Some models will draw a box or light an indicator in the region that it has locked focus on. To take the shot with these focus settings, you depress the shutter the rest of the way. This is what gives digital cameras their notorious shutter lag. Many manufacturers will skip this locking of the focus when you press the shutter all the way very quickly. Take your time and lock the focus before you shoot. Pay attention to where the camera is focusing and if it’s not grabbing the right area or it tells you it cannot achieve focus, let go of the shutter button and try again. Sometimes you may have to reposition the camera before trying again.
Know how focus works
Many compact digital cameras use an auto focus system that compares the contrast of lines in the potential photo. It will move the lens slightly back and forth comparing the edges of the lines until the blur disappears. The problem with this method is that if the object you are focusing on doesn’t have very well-defined lines, it can’t focus on them. If you are taking a photo of a feather in front of a brick wall, expect the camera to focus on the striking mortar lines of the wall rather than the soft edges of the feather. In a situation like this, you may need to use manual focus.
Know what focus needs
In order to ensure that your camera’s focus system is working optimally, you need to make sure that it has enough light getting through the lens. The more light, the more contrast, and contrast is what allows the camera to sense a sharp line. Some cameras have a focus-assist beam, a small, often amber or green light that will softly illuminate the subject to help the auto focus system. A good indication that you don’t have enough light to get a good focus is the activation of this focus-assist beam. To ensure a good focus, make sure you have good lighting.
Go manual
If your auto focus system is just not working, be sure you know how to properly use the manual focus setting. It’s a safe way of ensuring a good, accurate focus.
Controlling aperture
Another contributor to unsharp photos may be your aperture setting, which indirectly controls Depth Of Field (DOF). DOF is essentially how deep the focus is. The camera may be set up to only focus on a shallow depth, rather than the whole landscape, and some or all of what you are trying to shoot is out of that range. To fix this, either set your camera to landscape mode, or close the aperture to f/8 or more. Keep in mind that even though you broaden the depth of field by doing this, some lenses may drop in performance with smaller apertures, leading to overall less sharp photos.
Sometimes you may want to isolate your subject from the background, which would require a wider aperture, or what some cameras call “portrait” or “macro” mode. Your best bet is to set your aperture or camera mode to the setting that best fits the depth of focus you need.
Want more of the scene in focus?
Close your aperture (bringing the f-number to f/8 or f/16) or set your camera to its “Landscape” setting. This will broaden your depth of field to include more foreground and background in focus. Since this reduces the amount of light reaching the camera, make sure you have a lot of light or use a tripod. This setting should make both foreground and background objects in focus.
Want to isolate an object or person?
Open your aperture (bringing the f-stop to f/3.5 or f/2.8) or set your camera to its “portrait” or “macro” setting. This will narrow the depth of field so that only a small distance around what you are focusing on will be in focus. This actually increases the amount of light going into the lens and improves the apparent sharpness of your subject by blurring the background.

Focal length
The amount of telephoto zoom you use also affects your depth of field. A longer zoom needs more light, counteracting the aperture setting. So the more zoom you use, the more shallow the depth of field will be.
Another problem with long zooms is that they amplify and camera movements when taking the photo. Even the slightest heartbeat as you hold the camera can show up as a soft image when you use a large zoom. For a sharper image with greater depth of field, limit your use of long zooms or use a sturdy tripod.
The Photographer
Could you and your technique be the problem?
Limit movement
The faster your shutter opens and closes, the less camera and subject movement will be visible on a photo. A quick snap of the shutter will freeze the action and give you a sharp image. But a fast shutter speed means that less light gets in to expose the film or sensor, so you have to be taking a photo of a really bright scene, increase the light sensitivity of your film or sensor, or deal with the shutter being open long enough to give you a good exposure. As the shutter remains open, any movement by the camera or the subject will be recorded as blur.
Camera movement is a very easy thing to tackle. There are techniques and technologies to help you. Subject movement on the other hand is more problematic, since you can’t always control your subject and you also must deal with camera movement at the same time.
Get yourself a tripod and use it
The single best improvement you can take as a photographer is to buy and use a sturdy tripod. Even if you think you can hold a camera very still, your fingers, arms, shoulders, chest, heart, lungs, legs, feet and even the ground you stand on are all slightly moving. Those movements, in combination, are then multiplied by the zoom factor of your lens. The result: if you don’t have a very bright scene, your photo may soften due to this movement. Using a sturdy tripod, eliminates body movements and allows you to easily compose your shots. Even a cheap tripod would be an improvement over not having one at all. For those that don’t want to lug around a tripod, try a monopod or walking stick with a camera attachment.
When shopping for a tripod, be sure to get one that is light weight, easy to use and make sure it has a comfortable carrying case. You’ll find yourself leaving your tripod behind if it is too cumbersome to carry with you. I recently found the Gorillapod to be a worthwhile investment. This compact, lightweight tripod has bendable, shape-able legs that can wrap around objects, like a tree branch, allowing me to take and use a steady tripod in areas a standard size tripod would prove too cumbersome.
Don’t even touch the camera
This may be a little drastic for most, but some of my photos require the shutter to be open for up to 10 seconds in order to blur water enough to get the silky waterfall effects. Of course, I use a tripod, but when I put my hands on the camera to press the shutter, I risk shaking it and softening my image. So I use a remote shutter release, so I don’t even touch the camera!
Steady your hand-held shots
If you are caught without your tripod, it helps to set your camera down on a sturdy flat surface to help stabilize your shots. Set your camera on a railing, bench, parked car or lean it up against a lamppost or building – anything to stabilize it. If you must shoot completely hand-held, use two hands and the optical viewfinder. Using the viewfinder forces you to press the camera up against your face and use two hands, sort of like a human tripod.
Image stabilization (IS)
Some manufacturers refer to this as “anti-shake” or “lens stabilization.” They all lead to the same result… less blur due to camera movement. These devices counter the minute sways and shakes that give you soft images when you take hand-held shots. They are no substitute for a tripod and will not help with large camera movements or moving subjects. So don’t completely rely on image stabilization to keep your images sharp. Make sure you have image stabilization turned on when taking handheld shots.

This photo, taken while walking, suffers from motion blur. A stretching or doubling of the image is a sign of motion blur.
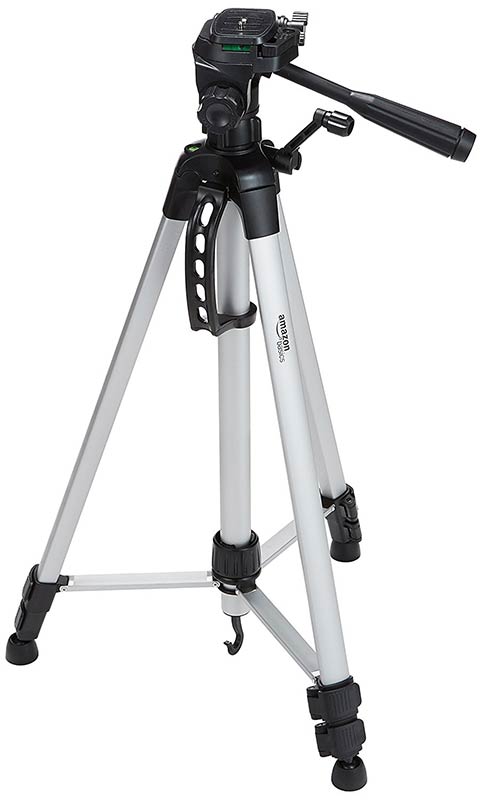
Even a beginner tripod, for as little as $20, can improve the sharpness and quality of your photos.
Increase your sensitivity
This must-have ‘miracle filter’ is the landscape photographer’s best friend.
A Polarizing filter is a must-have for an outdoor photographer. You will get results from a polarizer that you will not be able to replicate in software, even if you are a Photoshop expert.
There are two types of polarizing filters: Circular and Linear. Circular seems to be the most widely available and versatile. It’s the only one I recommend. What a circular polarizer will do for you is:
- darken blue skies
- remove reflections from water
- remove glare from wet surfaces
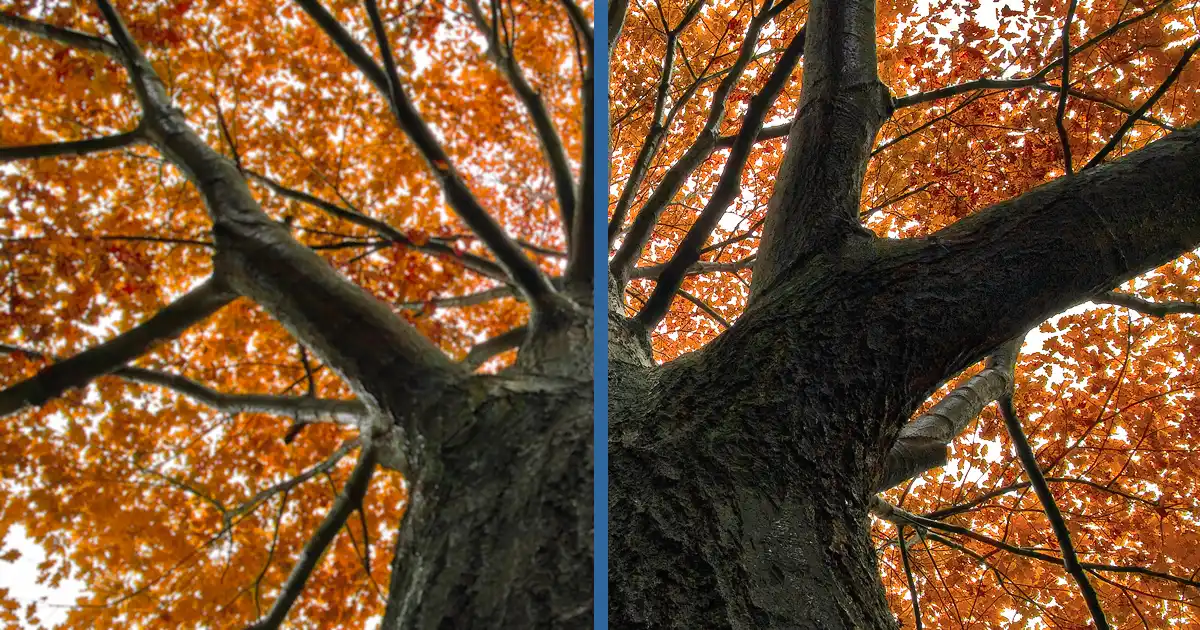
- remove the shine from foliage resulting in deeper colors
- saturate colors from reflective surfaces
In a nutshell, a polarizing filter reduces glare just like polarized sunglasses do. It counters the effects of strong sunlight, reducing glare from just about everything; from water to the sky. When you get rid of glare you improve the contrast and saturation of your scene.
 Low ISO (usually 50-400) has virtually no noise.
 As the ISO climbs, noise starts to appear, diminishing sharpness.
 High ISO (usually above 1600 for small cameras, 36000 and above for larger cameras) usually means excessive noise.
 To combat ISO noise, cameras usually use Noise Reduction algorithms, which, while reducing noise grain, also reduces details and sharpness.
Let there be light!
If you want to have sharper pictures you need to have plenty of light on the scene. So if you are getting soft images, why not add light yourself. Turn on some lights in the room, go outside, wait until the cloud-cover disappears or utilize a spotlight.
Use your camera’s flash
Although it may not be powerful enough to light a landscape, your camera’s flash can easily give you the extra light needed to get a fast shutter speed for most indoor shots. Outdoors, it can be used to light close-ups and foreground material. The only problems you have when using your flash is that the direct lighting tends to flatten the image and hide detail. It also may cast some heavy shadows behind the subjects. If the flash is too much (usually because you are too close to the subject), it may wash out the highlights and decrease sharpness.
Use a slave flash
A slave flash is detached from your camera and can be hand-held or set down anywhere. Some models will work with any camera and will trigger when it senses the camera’s flash. Not only will a slave flash give you extra illumination, but if you position it at an angle to your subject, it can help retain the lost detail and help prevent strong shadowing caused by shooting with your camera’s flash alone.
Add more light
Have desk lamps, a work light, or even flashlights? Use them if you can. Just make sure that you soften them up by putting a thin sheet of white paper or cloth over them, so they don’t cast hard light on the scene.
You can even direct existing light with the use of reflectors. The cheapest and often best reflector is actually a huge sheet of white poster board. Have someone hold it to reflect a zone of soft light onto a subject and fill in shadows.
What shutter speed am I “shooting” for?
A faster shutter is key to a sharper picture Although many cameras and conditions differ, here is a list of scenarios and their shutter speeds. If you cannot monitor or adjust the shutter speed on your camera, for fast moving subjects set your camera to the “Action” or “Sports” mode.
Subject/ Scenario | Rough Shutter Speed for sharp photos | Tips |
| Landscape (Nothing moving) | 1/15th sec. | Use a tripod |
| Still portrait | 1/15th sec. | Tell your subject to stay still. Use a tripod. |
| Casual handheld shot (with IS) | 1/30th sec. | Make sure IS is on. |
| Casual handheld shot (without IS) | 1/60th sec. | Make sure IS is on. |
| Subject walking | 1/30th sec. | Stay still and use a tripod. Do not move with your subject. |
| Subject running | 1/60th sec. | |
| Fast moving subject (car or bike) | 1/300th to 1/800th sec. | |
| Waterfall (stop-motion) | 1/100th sec. | A fast shutter speed will freeze droplets of water. |
| Waterfall (silk-effect) | 1/2 sec. or longer | The longer the water falls, the longer the shutter will have to be open. Use a tripod to avoid blur of the surroundings. |
The numbers above are really rough estimates of what your shutter speed should be close to for those scenarios. I would recommend getting used to the shutter speed by checking it when you shoot, then inspecting your resulting photo. Learn to associate your shutter speed with the conditions you are shooting in and the quality of the photographs you are taking.
Post processing – Sharpening tools
So even if you have perfect conditions, use a tripod and achieve the perfect focus, chances are your camera actually records a soft image. Digital sensors aren’t perfectly sharp, so most, if not all cameras, do a little behind-the-scenes sharpening on the photo before it writes to your memory card. When you shoot in RAW format, this step is usually omitted at the camera level and done when you open the RAW file on your computer. Some cameras do an excellent job of on-the-fly sharpening. Some take it too far and some play it safe by just adding a little. Some camera models allow you to adjust this sharpening factor to your liking.
It is typical to have to sharpen your images on the computer rather than rely solely on the camera to provide sharp images. In fact, it’s highly recommended that you sharpen your photos every time you output them (as a file for the web or as a print). For example, whenever a photo is resized, any previous sharpening may be ruined. Sharpening technologies used in applications, such as Gimp, PhotoShop, or Lightroom are very advanced and have many settings for many scenarios. Using tools like PhotoShop offers sharpening control and precision unrivaled by any other method.
When to apply sharpening
Unless an image is blurred and needs sharpening as a fix, you shouldn’t sharpen your image at all until you are ready to print or save a version for some other use. Why? Well, the strength (and possibly other settings) of sharpening that you may need will vary depending on many factors, most notably the size and resolution of the image, but also where the image will be used and how big the image will be when viewed. For example, a high-resolution image for printing may require more sharpening than a low resolution desktop wallpaper. So I would recommend saving sharpening for last and applying it as needed.
Sharpening too much
You should also sharpen last because it is a destructive process. It changes the pixels in the image and in many cases this is irreversible. So if you were to sharpen a photo drastically for a print to be hung on the wall, you may get great results, but take that same sharpened image and set it as your desktop background and it will have too many gaudy, bright lines (called halos). It was sharpened too much for its intended output. Hopefully you didn’t save over your original image with this overly sharpened one. That’s why it’s always recommended that you do all your touch-up work on an image, save it, run sharpening on it for whatever purpose you need it now, and don’t save over your unsharpened image! You may need it to resharpen for another output someday.
 Original image.
 A moderate amount of sharpening for viewing on screen. A little goes a long way.
 Over-sharpened will look terrible on screen but may result in better prints.
(Don’t save over your original with this version).
