Photographing Waterfalls: A Beginner’s Guide


There is nothing wrong with having a passion for photography, yet not knowing the first thing about taking good photos. Everyone has to start from somewhere, and there is plenty of information out there that will help you improve your skill and create more and more beautiful pictures of the subjects that you love most. The first of a series, this guide will help the novice camera user take better photos of not only waterfalls, but other subjects as well. Here we cover the fundamentals for the beginner. Subsequent articles tackle more advanced concepts.
Know your camera
Knowing your camera settings and capabilities allows you to choose the right settings for the moment, and that means better photos.
Before you set off to photograph anything, you should get to know your camera. Read the instruction manual, learn all the functions of your camera, and find out how and when those functions should be used. Some cameras even come with “waterfall” or “landscape” modes that make taking outdoor photos easier for you. If you don’t know what your camera’s built-in functions are capable of, you can’t take advantage of them.
If you aren’t an experienced photographer, these are the first places to start when trying to improve your photos in-camera. Take some time and try each one. In the digital age, it’ll cost you nothing to run around your house taking pictures of random things to try out the different features of your camera. Load up those images on your PC and see what works best for different situations.
It’s also a good idea to get to know the capacities of your camera. Figure out about how long the batteries will last (maybe you will need to take a spare or two on that hike). Learn how many shots can be taken on a certain memory card. Experiment with how quickly you can turn it on and take a picture. Try to gauge how much light is needed to get sharp results. General knowledge of the performance of your camera will greatly improve your picture taking because you will know what to expect from it. If you’re out in the field and have trouble with your camera, an error message, or the camera just isn’t doing what you expected it to, having some knowledge of the display, sounds the camera makes, or its general behavior could help you troubleshoot it and you’ll be able to continue shooting. There’s nothing worse than traveling to a site and coming home short of the photos you wanted just because of a technical issue.
A great way to learn about the features of your camera is to check out a professional review like the ones found on Imaging Resource. Sometimes they get a bit technical, but skimming the review may reveal some cool features you never knew your camera had.
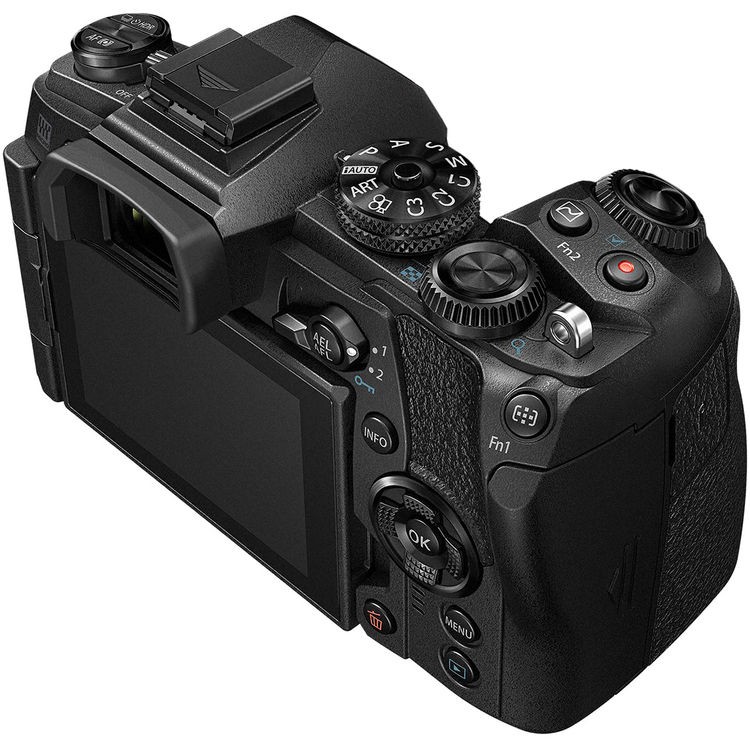
Do you know what all the switches, buttons and dials on your camera do? They are all tools for improving your photographs. Learn them!
Know your shooting location
Do a little research about the places you plan to photograph. Know the best things to photograph and how to get to them quickly and safely.
Before heading out, have at least some foreknowledge of the site you are going to. Check street maps, so you don’t get lost along the way. Topographic maps, so you have some idea of the structure of the terrain. And most importantly, trail maps, so when you get there, you know where to go. If you have limited time to photograph, it’s good to know where the best locations are ahead of time, so you can get them out of the way first.
A good idea is to check the Internet for any information about the location, such as what wildlife to look out for, current status of trails, or access and best viewing or photographing locations. Discussion groups, such as the one found on NYFalls.com are a great place to ask and answer questions about a location and get critical information before you begin your trip. An important thing to know before heading out is whether or not the location is publicly accessible. If you are careless, you could be arrested and/or fined for trespassing on private property. For most publicly-accessible waterfalls, you’ll find plenty of information about how to get there and what to see and shoot. If you can’t find it, ask!
Check the weather
Keep these things in mind when checking the weather: How will the sky be when I get there? How much rain has there been or will there be?
Lighting is the biggest factor contributing to a quality photograph. And the condition of the sky is the most important thing for waterfall photos. It’s always a good idea to check the weather ahead of time. Of course, heavy rain and snow is always a deterrent for going outside; checking the forecast for cloud coverage is always advisable.
Clear blue skies and partly cloudy conditions are great for shooting wide open areas, where lighting is even. I always prefer photographing Niagara Falls when the sky is blue and maybe has a few clouds high up to fill the top of my frame. Since Niagara is massive and out in the open, the sun is spread evenly over it and the surrounding pavement, trees, and tourists. There’s no problem making an evenly exposed image under those conditions.
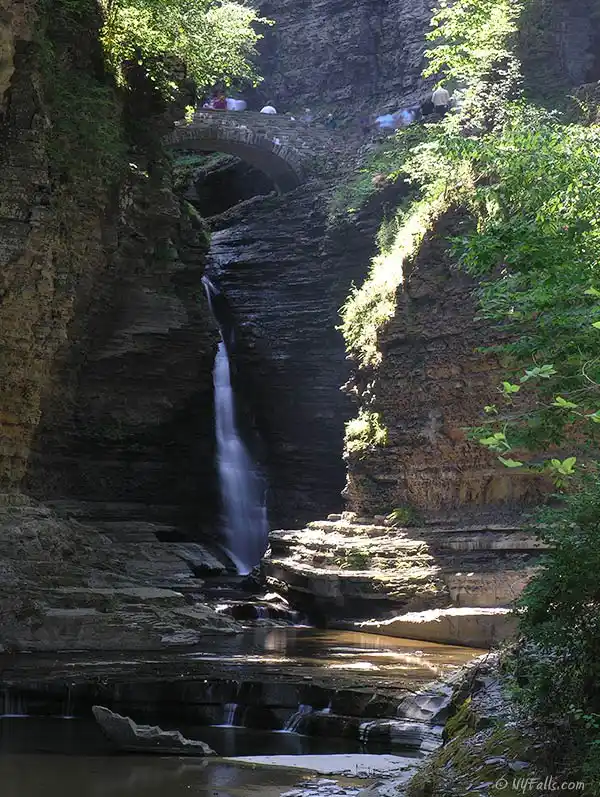
In deep gullies, like Watkins Glen, bright and sunny days are not ideal. The cliff edges and the canopies up top block the sun in some spots, and let it through in others. This causes extremely bright conditions in the trees and wherever light shows through, and dark shadows deep in the gully where light doesn’t quite reach. This uneven light makes it very difficult to photograph because a camera can’t capture the super bright and the super dark in the same photograph. You either have to expose for the light or the dark. If you expose in the middle, you lose a lot of detail on both ends.
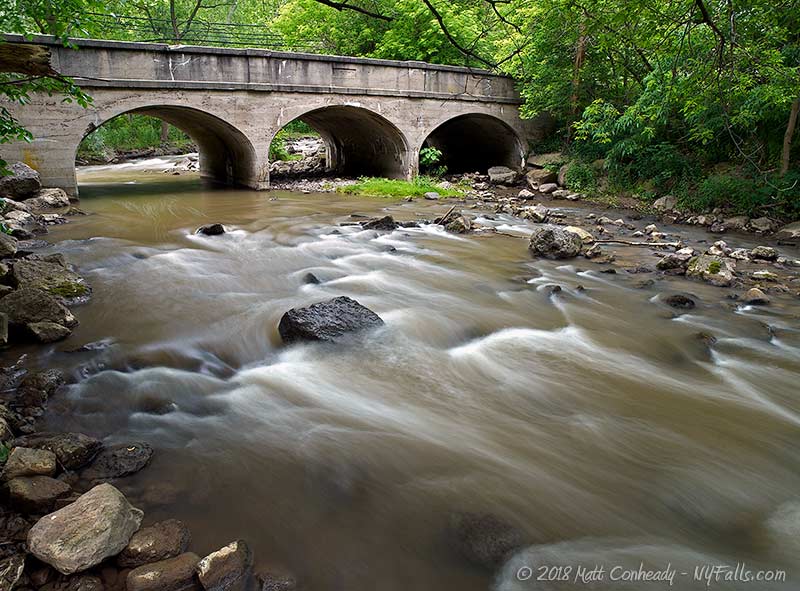
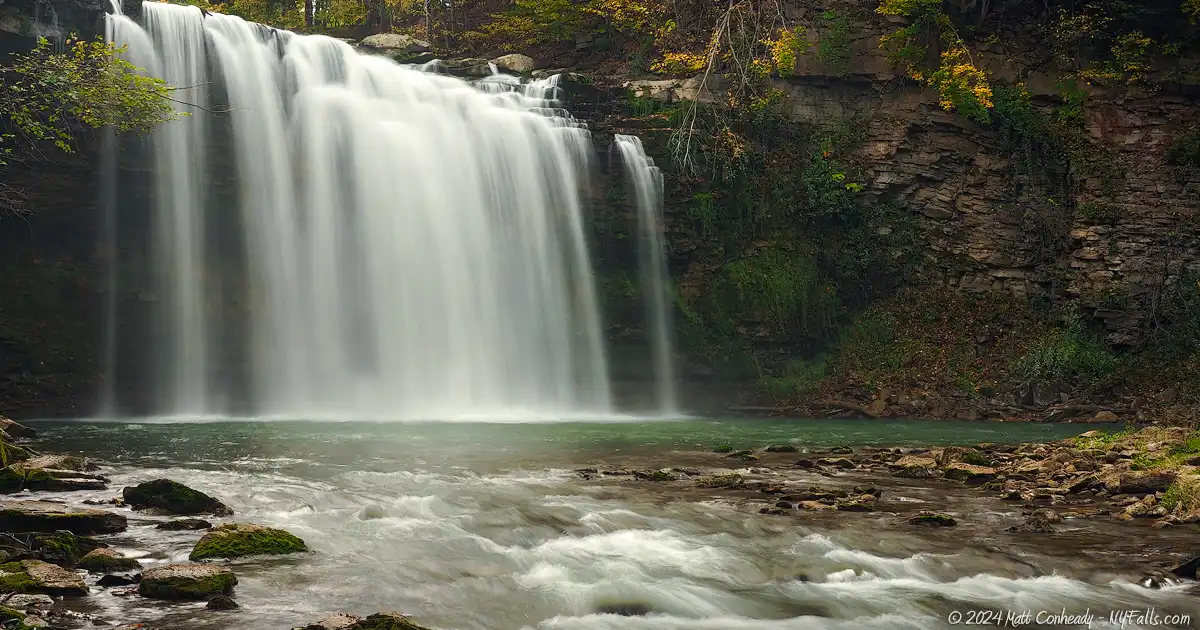
Overcast skies are perfect for photographers. The lighting is even and mild and spreads evenly across even the deepest gorges. I also find it to be a bit more comfortable to be out and hiking in a park all day without the sun shining on my neck. Also, when there are overcast skies, there usually is rain. If it rained the previous day, perfect! The waterfalls should be flowing quite well. If it hasn’t rained yet, well… that’s why I told you to keep an eye on that weather forecast. The downside to overcast conditions is that if you want a dramatic sky in your shot, you’re not going to get it. Open area waterfalls like Niagara and Ithaca Falls, have some great photo opportunities that can include the sky above the falls. A bright blue sky as a backdrop can really make a photo pop, and in the case of Niagara, color the water a deep aquamarine. Overcast skies will just make these falls look dull.
A waterfall photo taken in bright sunlight. There is no balance between light and dark.

A waterfall photo taken under an overcast sky. Light spots transition well to shadows.
Get there early (or late)
Times of low light are a great way to avoid crowds and to get better lighting for your photos.
I’m not much of an early-bird and I miss out on a lot of great photographs because of it.
A great way to avoid direct sun and uneven lighting is to get the jump on the sun and get out to site early. But lighting isn’t the only benefit to waking up early. For one, you beat the crowds and can get photos of very popular locations (Taughannock, for example) without all the tourists in the way. You also get more even and mild lighting with a touch of warmth as the sun rises. Without the sun directly above, there is little glare and little to no sunspots shining through the tree canopy.
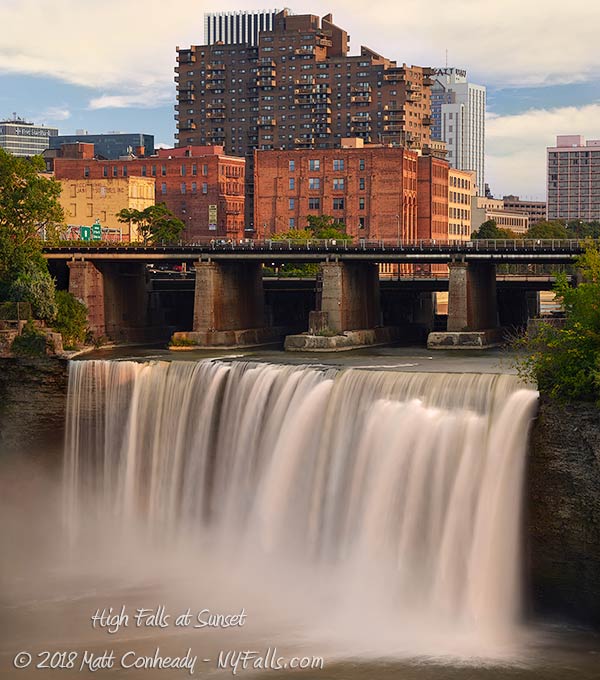
The same is a true for later in the day, when the sun is getting close to setting. My favorite time to photograph is “golden hour.” That one fraction of the day where the sun is setting and the light, warms and diminishes. It creates mild contrast, even lighting, and excellent golden colors. The downside is that despite its name, it barely lasts an hour, and you have to work fast before its gone.
The great thing is that even after the sun disappears, you still have some time when the sky is filled with even light (more so in the summer). So, if you have overcast skies, excellent lighting conditions can be had both in the early morning and right at sunset and shortly thereafter. It also just so happens that many of the more popular destinations are less crowded than during the daylight hours when the sun is high in the sky.
Shoot steady
Eliminate camera shake and set up your compositions better by using a tripod.
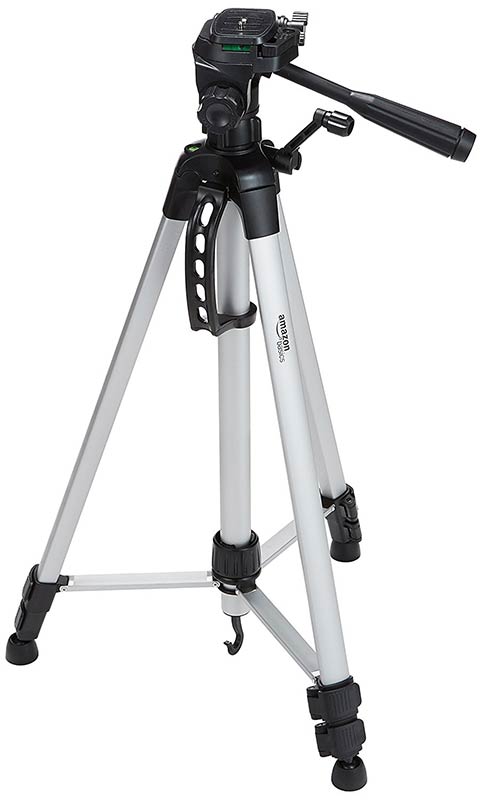
By far the most important advice I can offer for the beginning photographer is to use a tripod when shooting.
When you take a hand-held shot, no matter how still you think you are, you shake, and your resulting photo blurs slightly. When using your camera zoom that shake magnifies and cameras with very long zooms and no image stabilization can yield unsharp and soft results. By resting your camera on a tripod, you can virtually eliminate shake. Tripods also allow you to level and pan your camera with ease. You also gain the ability to take multiple identical shots and shots with long exposures. You can use a long exposure to create the blurred, silky appearance of water you see on many of the photos on this website.
Nowadays, you can get very light weight, inexpensive tripods with carrying cases that can attach to your backpack or strap to your shoulder. Even a cheap tripod will make an improvement over a hand-held shot. If you can’t lug around a tripod, try a monopod (which is one leg instead of three). They even make walking sticks that double up as monopods- perfect for hiking.
I recommend that if you’ll be hiking with your tripod, choose aluminum or graphite for both high strength and low weight. You also want to look for a quick release camera feature so you can quickly take off your camera and use it handheld as needed. Also test how easy it is to set up and collapse the tripod. A tripod that you can’t easily set up or quickly pack up can be a real pain in the ass when stopping to take photos frequently. A sturdy carrying case is also recommended.
Bracket your shots
Even the fanciest cameras may not get the exposure right on the first snap. Taking a series of different exposures at a time can help you choose the best exposure later.
Many cameras come with a feature called “bracketing.” Bracketing means your camera will take a series of shots, each of different exposures, from one press of the shutter. You can set the difference between each exposure from 0.3 to 1 stop of light, and also set the number of exposures to be taken in one shutter press. What this allows you to do is for each set of photos you take you have the chance to go back and pick the best exposure out of the bracketed set. You can make this choice on the camera right after taking the photos, or on your PC with a larger monitor.
Since cameras rarely get it right the first time you’ve created an opportunity to go back and pick the best in the series. If you’re using a tripod and are a little bit more advanced at Photoshop, you can even combine different exposures to get better results. Check your manual to see if your camera supports bracketing and if you have enough memory on your memory card to start taking advantage of it. I highly recommend using it.


Using a tripod, i shot a series of 3 photos at different exposures using the bracketing feature of my camera. Back at home I decided the middle one was the best exposure. The left exposure was too dark and the right one was too bright.
Experiment
The best way to learn photography is to try various things and see what works and what doesn’t.
As I stated before, you should experiment with all of your camera’s various settings in order to get to know your camera and what it can do. You should also get in the field and experiment with different ways of taking photographs of waterfalls. Don’t just take the usual shot or “postcard shot.” Everyone who’s been there, has already taken the same shot. Be different, think differently and shoot differently.
Don’t just fill your frame with the subject. Try to include foreground and background elements; boulders or the stream bed in front of the falls, trees behind the falls. Also take close-ups of sections of the falls, not just the entire thing. Include people, which helps emphasize scale and bring realism to the photo. Waterfalls can also make a great backdrop to a portrait.
Include obscure angles. If safety allows, try getting to different locations, rather than the typical lookouts. You may also be able to frame your subject with foreground elements. An outcropping in the trees with a clear view of the falls makes a great natural frame.