5 Quick Tips to Improve Your Waterfall Photos


Everyone’s taste in photography is subjective, not only in terms of aesthetics but also in the emotions and atmosphere a photo evokes. Thus, there isn’t a universally perfect formula for a waterfall photograph—or any photograph, for that matter. However, certain elements are widely recognized for making a photo more appealing, particularly to those with an affinity for waterfalls. These common denominators help viewers connect with and appreciate the captured scene.
In my own photography, I strive to capture not just a literal depiction of waterfalls but to evoke a sense of familiarity and authenticity that resonates with the average observer. My goal isn’t to produce a flawless, poster-worthy image every time. Instead of overwhelming viewers with intense colors or unconventional angles—such as those from a drone—I focus on creating images that mirror the memories of those who have experienced these places firsthand.
I invest effort in being present under ideal conditions for the particular location and utilize techniques to elevate my photos beyond the everyday phone capture. Sometimes that approach pays off with superb shots. Sometimes it’s impossible to make the mundane seem epic. It’s best to consider those humdrum captures as an act of documentation instead of trying to post-process them into something miraculous. An overly strong attempt to compensate in Photoshop by cranking saturation or over-processed HDR is very transparent and contaminates an otherwise strong portfolio.
The most impactful photographs, I’ve discovered, are those that authentically capture the essence of the waterfall as one might remember it. They highlight the interplay between light and water, embodying both power and tranquility, reveal the grandeur of the surrounding landscape, and show off intimate details that give each waterfall its unique character. Aim to evoke the feeling of being there, so that viewers familiar with the place are reminded of its beauty, and those who have never visited feel an irresistible pull to experience it for themselves.
These tips, while straightforward and seemingly obvious, are often overlooked in much of the waterfall photography seen online. Bearing these suggestions in mind while shooting and during post-processing can significantly elevate your photos, setting them apart and resonating deeply with those who hold these natural wonders dear. By focusing on these key aspects, your work can transcend the ordinary, capturing not just images, but memories and emotions of those cherished places.
Natural scenes look best with natural color
Too much color processing
Instagram filters, high dynamic range (HDR), and the ever-popular saturation dial are photography trends that some use to mask inadequate technique. While overprocessing can be an artistic choice, it’s also a simpler, albeit less respected, method to elevate an average photo above the ordinary. Regardless of personal views on heavy processing, it’s undeniable that these techniques are overused, mainly because they represent one of the easiest ways for novices to enhance their photos post-process.
When was the last time you saw moss radiating an unnaturally bright green, or fall colors so fluorescent they seemed to challenge the capabilities of an HDR phone screen? Or perhaps creek water so vividly blue, it resembled the depths of the Caribbean rather than a stream in Upstate New York? These techniques have become the digital equivalent of Hong Kong’s neon signs on social media feeds, used to grab attention. To the average viewer, surprisingly, they often succeed. Yet, for those who give more than a cursory glance as they scroll, the illusion quickly fades. Clouds and water don’t naturally look like that. Fall leaves don’t outshine the sun. This is not the reality cameras or human eyes perceive. Seeing such clouds in real life, one might be compelled to run for their lives and it would be covered on national news! Over-processing, therefore, tends to alienate fellow photographers, enthusiasts, or anyone who pauses to critically assess the colors and contrast. In a sense, it’s a lie about the scene and the photographer’s abilities. Want to spot a fake, overprocessed scene? Look at the flora. Are those leaves natural-looking or Radium-223?
When processing your shots, ask yourself: Does this resemble a natural scene? What looks genuine, and what doesn’t?
If you’re unsure, look outside for a real-time reference or check stock photography websites to make sure you aren’t straying too far from reality.

Acceptance is a more valuable skill than faking
Exercise caution with your colors, aiming for realism. It’s okay to adjust colors, saturating being one of the more common techniques, but once you rely on cranking the saturation to make it the only draw of your photo, you’re likely going too far and too unrealistic. Not every scene you photograph is going to drop jaws, but in all honesty, I’d rather wait for that moment to happen than hyper-saturate photos to force that feeling. It’s a tiring trick and it’s transparent.

Watch those greens
Digital camera sensors struggle with capturing proper greens. The Bayer arrangements on cameras’ sensors have twice as many green pixels as red or blue, so the camera (or RAW processing software) then has to rebalance that captured color to something more natural. Greens are especially challenging to get right because the human brain tends to know very well what range of greens look fresh and natural. When post-processing images, people tend to crank the saturation of all colors to get better reds or blues and absolutely overkill the greens in the process. Selective color saturation is a far more advanced technique for giving some objects in your photos more punch, with the control to keep greens in check.
Use reference
Keep an eye on your greens not just when adjusting color, but during the whole adjustment process. A good practice is to keep a few reference images of foliage open, and when adjusting saturation, adjust it one color at a time, being cautious when cranking greens and yellows, the most common colors that make up foliage. Sometimes, if I’m expecting to process my photos shortly after capture, I’ll grab a leaf or two from the scene and bring it home to use in color matching.
Careful polarization
If you use a polarizing filter when photographing waterfalls it’s important to realize that it will remove reflections from the surface of leaves, flattening the range of colors across plants, and often giving them a solid, unnatural color. I still recommend using a polarizing filter to reduce glare on waterfalls and improve the contrast of a wet scene, but keep an eye on your foliage too, and avoid cranking the polarizing effect so high that all the leaves go flat green.

Waterfalls aren’t blue
Water can indeed sometimes appear blue, usually in deep, mineral-rich bodies of water. Even then, the hue is more accurately described as aquamarine rather than a stark, bold blue. Outside of these specific circumstances, any other representation tends to look unnaturally vibrant, as if colored with a pack of crayons rather than by Mother Nature.
In the streams and rivers of Upstate NY, encountering rich blues is a rarity. Within waterfalls, such colors are simply unnatural. Water tends to become whiter as it agitates and incorporates air. The farther the water drops, and the more it tumbles, the whiter it gets. This phenomenon explains why even the Niagara River, which displays a brown or aquamarine color along most of its course, turns white as it cascades over Niagara Falls.
Beat the blues
With photography, there are usually two causes of blue waterfalls:
The first one is easy: too much saturation in post processing. The solution: Don’t do it.
The second one is a bit more excusable: the camera’s white balance is too cool. Some cameras allow you to change it to a warmer setting (or the shade/shadow setting often works well). I typically use 5400k in bright warm settings, and 6200k in darker, cooler conditions. With phones, you may have to dig deeper to find how to change it, or you can try tapping different colored objects in the scene to see if it picks up a new white balance setting.
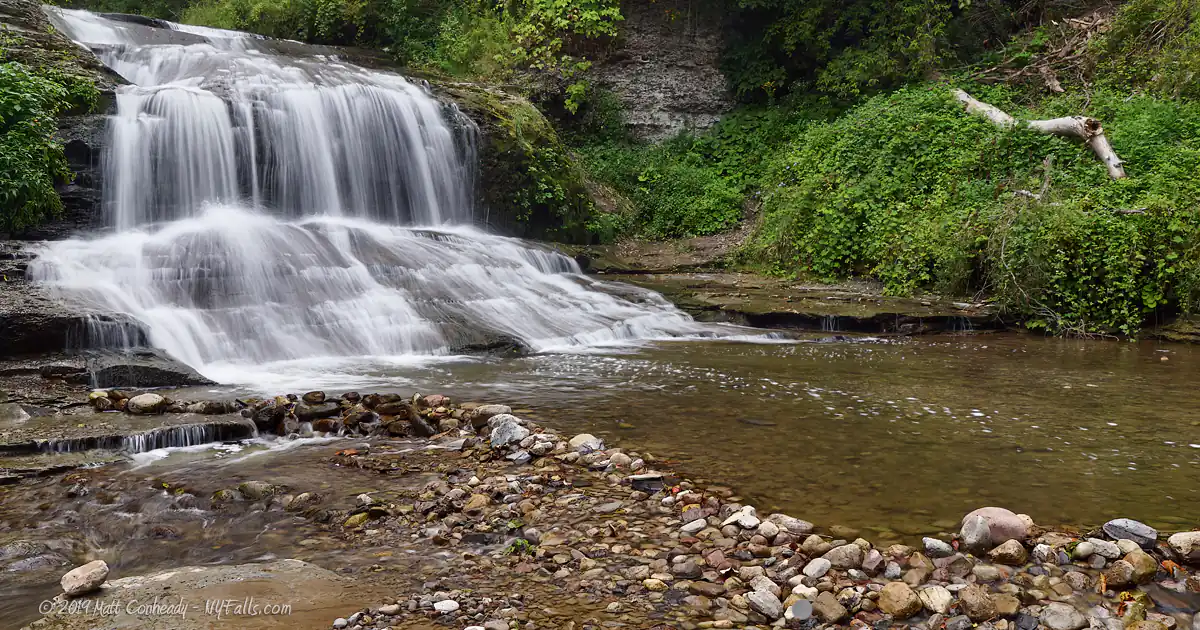
Bright and white
The waterfalls in your photos should captivate the viewer’s gaze. In most cases, you’ll want them to appear pure and serve as a stark contrast to their colorful surroundings. Ideally, they should be the brightest elements in the scene, aiming for a pristine white or a slight turbidity. When setting your exposure, ensure the whitewater in your frame is vivid and bright, just shy of overexposing the highlights. During post-processing, it’s advisable to selectively mask the area around the falls and slightly increase the brightness of the water to make it a dominant feature of the scene—be careful, however, not to lose the fine details within the water.
If your whitewater appears overly tinted, the same masking technique can be employed to correct the color. The color balance tool, along with selective (de)saturation, can be particularly effective. The goal is not to remove all color from your waterfall, as this can render it unnaturally stark, but to diminish the tint just enough so that the waterfall stands out as a beacon of purity amidst a vibrant and detailed environment.


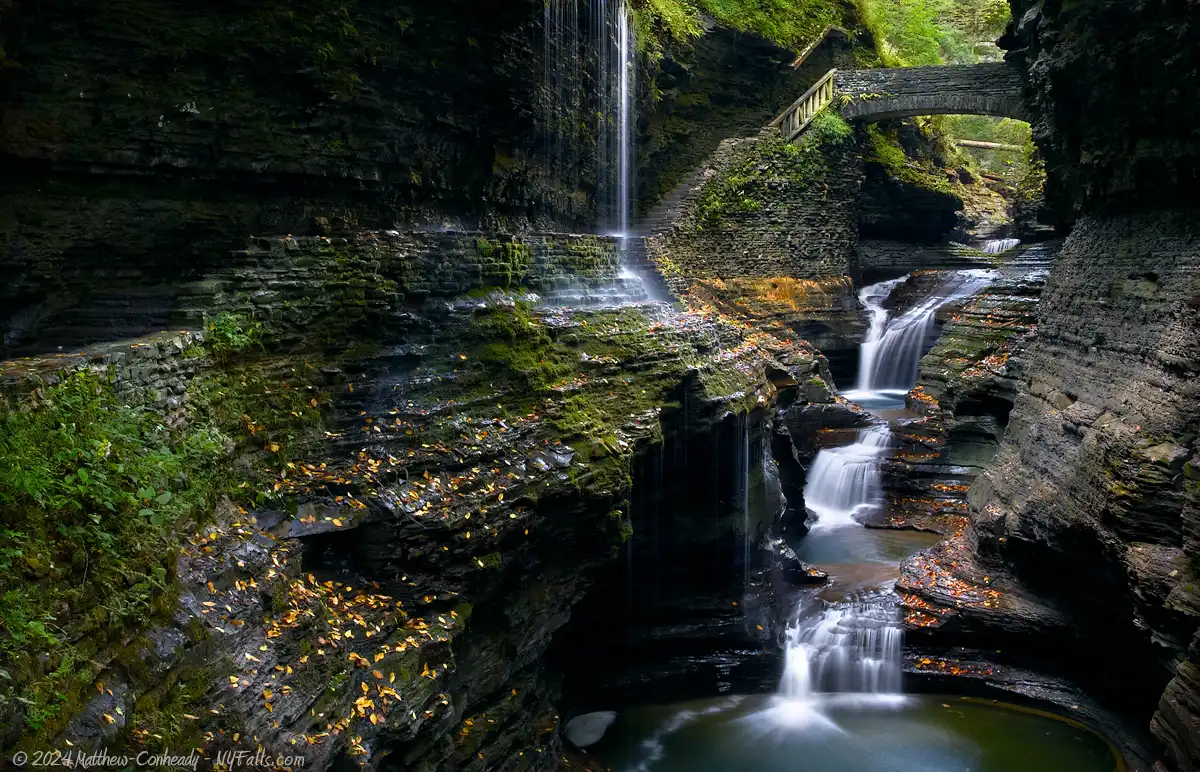
Use shadows
We’ve talked about the water and how it should be bright and white, but let’s now focus on the opposite. Shadows play a pivotal role in the composition, detail, and narrative of waterfall photography, often overlooked yet crucial in crafting visually compelling images. They are not merely the absence of light but an active element that shapes the viewer’s perception of depth, texture, and mood. Understanding and harnessing shadows can elevate your waterfall photographs from simple snapshots to intricate artworks.
Composition and depth
In composition, shadows help define the structure of the scene, drawing attention to the contours and shapes within the landscape. They create a sense of depth and three-dimensionality, making the waterfall and its surroundings appear more lifelike and palpable. By emphasizing the play between light and shadow, photographers can highlight the dramatic topography around waterfalls, from the rugged rocks to the delicate water mists. This interplay adds layers to the composition, inviting the viewer to explore every corner of the frame.
Either through the lens or in post, I find it important to note where the shadows are in your scene and either through exposure or in Photoshop, make sure they are dark enough. With shadows you are emphasizing the path of light through your scene, creating depth, and defining the mysterious. Use shadows to help make your composition more deep and interesting.
Detail and texture
Shadows are instrumental in revealing the texture of the water and the landscape. In waterfall photography, the contrast between the smooth flow of water and the static, textured background of darker rocks and vegetation is accentuated by shadows. They emphasize the water’s shimmer and the roughness of natural elements, contributing to a richer visual experience. The direction and quality of light, along with the resulting shadows, can transform the appearance of water from a gentle cascade to a powerful torrent, offering insights into the waterfall’s character. While you are unlikely to have many shadows on the water itself, capturing and enhancing the shadows behind the water can make the waterfalls jump off the page (or screen).
Narrative and Mood
Perhaps most importantly, shadows contribute significantly to the narrative and mood of a waterfall photograph. They can evoke emotions, from the tranquility of a shaded pool to the mystery of dark, hidden crevices behind the falling water. Early morning or late afternoon shadows can convey a sense of time and fleeting beauty, while harsh midday shadows might highlight the ruggedness and endurance of the natural landscape. Shadows can also play a critical role in storytelling, suggesting the presence of unseen elements or the passage of time, making the scene more dynamic and engaging. While overcast skies are typically the favored conditions for waterfall shooting, due to low reflections and lack of bright sunspots messing with exposure, shooting under completely scattered light creates scenes too evenly lit and they appear flat and dull.
Incorporating shadows thoughtfully requires an understanding of light direction, intensity, and the photographic environment. It’s about finding the right balance where shadows enhance rather than overpower the scene. Photographers must observe and adapt to how shadows fall and change, using them to guide composition, highlight detail, and imbue their images with emotion and narrative depth.
Nowadays photographers are too scared to lose details in the shadows, because high-tech cameras do so well at preserving them, but you should learn to embrace it. Shadows are extremely important to the depth of both your technical shot and visual and narrative.


Avoid softening powerful waterfalls
Slowing down your shutter speed to emphasize and blur motion is a common technique in waterfall photography. Although some may not favor this “silky” or “cotton candy” effect, it is widely employed by most waterfall photographers, myself included, and has become a standard practice.
Fast shutter speeds freeze motion, capturing a very brief moment in time along with all the random drops, drips, and curves in the water at that instant. This transforms a fleeting moment from an infinite series of moments into a permanent memory, which doesn’t quite align with what the human eye perceives or remembers.
By slowing the shutter, the camera sensor blends all those micro-variances into a smooth flow of water, averaging the intricate details into a narrative about the water’s journey. It shifts the focus from a specific moment to the overall movement of the water, allowing the photographer to find a balance between blur and detail by adjusting the shutter duration.
Smaller Waterfalls / Longer Exposures
Longer exposures brighten and whiten waterfalls by merging more details into a continuous streak of blur. This is particularly beneficial for smaller or drier waterfalls, creating bold silky blurs that better emphasize the falls within the scene. It clarifies the path of the falls, especially where the flow is light.
For smaller waterfalls, I usually opt for shutter speeds of half a second or longer, extending to 2 seconds if the water flow is minimal to better highlight the water’s path.

Larger Waterfalls / Shorter Exposures
Larger waterfalls, with their height and power, require a different approach. Slowing the shutter to introduce blur can make them appear less formidable and awkwardly shaped. The faster flow over long drops results in a longer blur over shorter durations, reducing the need for extended exposures. Thus, for very large and tall waterfalls, a slight blur or even no blur is often preferable. For instance, Niagara Falls possesses so much inherent detail that motion blur is unnecessary and can detract from its majesty.
For moderately large waterfalls, like Rochester’s High Falls, Letchworth Falls, or Taughannock, I aim for shutter speeds of 1/20th of a second or faster.
For capturing the power of massive waterfalls, such as Niagara Falls, I shoot as quickly as possible.

Exceptions and General Guidelines:
- Small waterfalls: 1/2 second or longer.
- Small waterfalls with low flow: 1-2 minutes.
- Moderately-sized waterfalls: around 1/5th of a second.
- Moderately-sized waterfalls with low flow: 1/2 second or longer.
- Large waterfalls with tall drops: around 1/20th of a second, just enough to elongate a droplet.
- Large waterfalls with many small cascades: 1/5th of a second or longer, treated like smaller waterfalls.
- Massive waterfalls with significant power: as fast as possible.
- Massive waterfalls in low light (night or illuminated): slow down to about 1/3 of a second.
These guidelines offer a starting point for experimenting with shutter speeds to achieve the desired effect in waterfall photography, but you should find your own sweet spots. Experiment with various shutter speeds every time you shoot and study your images when back at your PC. Which speed best emphasizes the power and movement you witnessed while you were there?
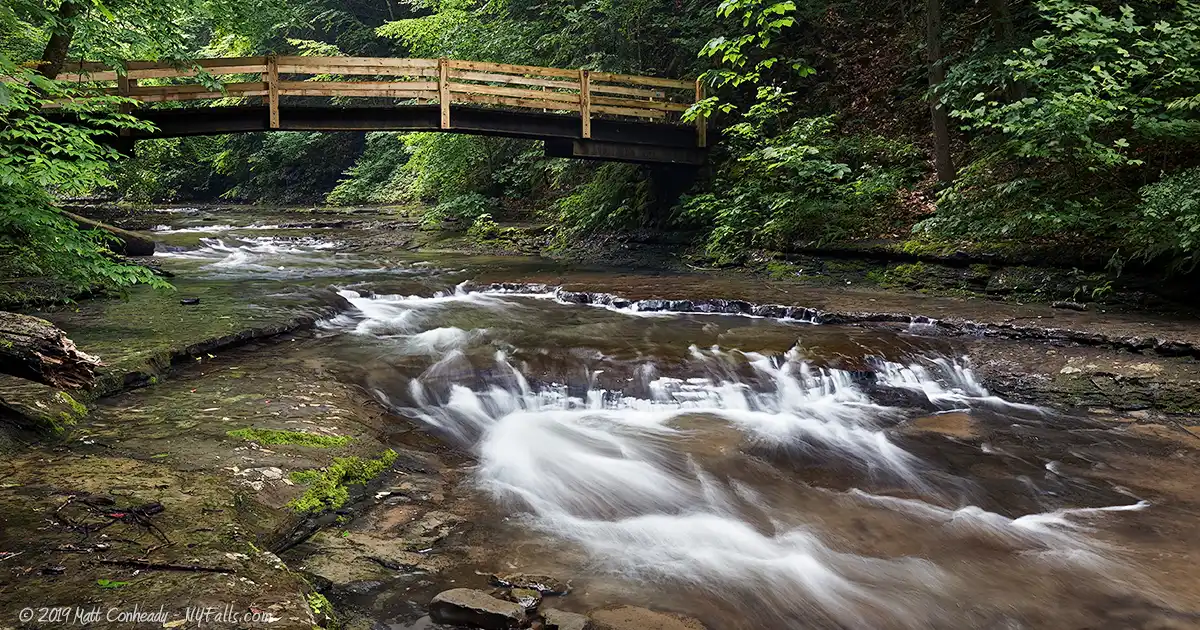
Guide eyes across your frame
Avoid centering the waterfall in the frame
This is a tip more for the beginner or for those who are stuck doing this very thing. Centering the waterfall in the frame is a common instinct for many photographers, aiming to highlight its majesty as the focal point. However, this approach can sometimes lead to a composition that feels static and unengaging. By placing the waterfall directly in the center, the image loses the dynamic tension and balance that can be achieved through more thoughtful composition. Utilizing the Rule of Thirds, for example, by positioning the waterfall off to one side, can create a more balanced and visually interesting scene, gaining a sense of travel. This technique allows for the inclusion of additional elements such as the surrounding landscape, the flow above and below the falls, enriching the story the photo tells. It encourages the viewer’s eyes to move through the image, exploring its details and depth, rather than resting on a single, central point. In essence, avoiding the direct centering of a waterfall can transform a straightforward shot into a captivating narrative, enhancing the viewer’s experience and engagement with the photograph. To help with this, employ the Rule of Thirds.

Rule of Thirds
The Rule of Thirds is a fundamental principle in photography that involves dividing the frame into nine equal parts with two equally spaced horizontal lines and two equally spaced vertical lines. Placing the waterfall or key elements of the scene along these lines or at their intersections can create a more balanced, dynamic, and aesthetically pleasing composition. This technique encourages photographers to move beyond centering the subject, leading to more engaging compositions that capture the viewer’s interest.
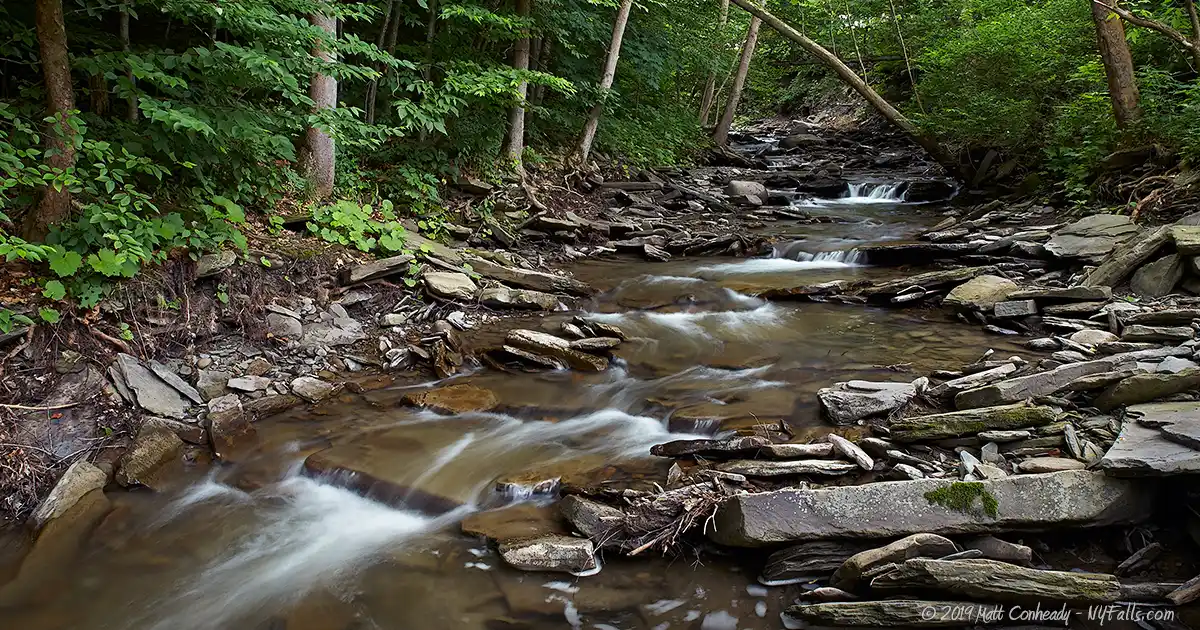
Guide the viewer’s eye
In waterfall photography, the way the viewer’s eye travels across the frame is of utmost importance. The goal is to guide the viewer through the image in a way that feels natural and allows them to fully appreciate the scene. Obviously, the path of the water can serve as a powerful compositional tool in achieving this. By aligning the waterfall’s flow from the upper sections of the frame towards the lower sections, or by using the surrounding landscape to lead the eye towards the waterfall, photographers can create a sense of movement and depth.
The inclusion of leading lines, such as the river or stream feeding into the waterfall or the rocky edges of the waterfall itself, can further guide the viewer’s gaze. These elements act as visual cues that draw the eye into the scene, towards the main subject, and possibly towards a vanishing point, adding a sense of perspective and scale. In my photography, I often compose the waterfall in the top 1/3 or 2/3rds and leave the bottom of the frame to show where the water travels after.
Compositional Elements
Beyond the Rule of Thirds and guiding the viewer’s eye, several other compositional elements can enhance waterfall photography:
Foreground Interest: Including elements like rocks, plunge pools, leaves, or branches in the foreground can add depth to the scene and create a layered effect, making the photo more dynamic, and gives viewers a chance to experience more of the setting than just the waterfall.
Framing: Using natural elements like trees or overhanging branches to frame the waterfall can focus the viewer’s attention on the subject and add a sense of depth and context to the photograph. Again, this also helps viewers understand what it’s like to be there. If the falls is in an open area with an unobscured viewing area, perhaps this technique is inappropriate. If you had to bushwhack through dense forest and shoot through the trees to get your shot, tell that story in your composition.
Experimentation
While these guidelines can serve as a starting point, the most compelling compositions often come from experimentation and breaking the rules creatively. If everyone follows the rules, composes perfectly, and exposes the same way, all the photos will look the same. There’s a place for technically perfect cliched photographs, and I certainly take them. But do not let any guidelines limit you. Trying different angles, perspectives, and compositions can uncover unique and unexpected ways to present the waterfall, making your photographs stand out. Always consider the mood, atmosphere, and story you want to convey through your image, and let these elements guide your compositional choices.
Before heading out to a well-photographed waterfall, I highly recommend researching how people have been shooting. Check Instagram, stock photography and tourism websites to see what is the standard, then set out to break it.

